Cluster via Command-Line#
Overview#
Bash (Bourne Again SHell) is a popular shell and command-line interface. Specifically, a shell is an interface between the user and the underlying operating system, allowing users to interact with the system and perform tasks. Bash provides a range of features for running commands, managing files, navigating systems, and performing other tasks.
Bash commands perform various tasks within the shell environment. Commands span basic functionalities (e.g., ls, cd, cp, mv, and rm) to more advanced ones(e.g., grep and awk). We cover these commands and more in this tutorial. Bash can also be used in scripts, allowing users to automate tasks and perform more complex operations via loops, conditional logic, and defining functions, which we cover at the end of this page.
In summary, shell commands perform various tasks with the terminal.
Terminal#
The terminal - the command line interface (CLI) - is a text-based interface for interacting with an operating system. It is a way for users to interact with the system and perform tasks by typing commands and receiving text-based output.
In contrast to graphical user interfaces (GUIs), the terminal provides a more direct and powerful way to interact with the system. Tasks requiring several steps in a GUI can often be accomplished much more quickly and efficiently in the terminal.
Whether you are a beginner or an advanced user, the terminal provides a powerful and versatile interface for interacting with your operating system. With some theory and practice, you can use the terminal to accomplish a wide range of tasks and take control of your system in new and powerful ways.
Various terminal options (i.e., flavors) are offered for different operating systems. Power Shell is available for Windows, Linux, and MacOS.
Let us explore options and specifics for each operating system; Mac, Linux, and Windows terminals.
MacOS#
macOS comes with a default terminal program, but more advanced terminals are available; iTerm2 is one of the more popular choices.
To launch the terminal:
Press Command(⌘) + Space on your Mac keyboard (alternatively, press F4)
Type “Terminal”
When you see Terminal in the Spotlight search list, click it to open the app.
iTerm2 can be installed via the terminal using Homebrew:
brew install --cask iterm2
If Homebrew is not already installed, run the following command in the terminal before installing iTerm2:
/bin/bash -c "$(curl -fsSL https://raw.githubusercontent.com/Homebrew/install/HEAD/install.sh)"
Linux#
Linux also comes with a default terminal program, but more advanced terminals are available; Terminator is a popular choice.
To download Terminator, open a terminal (Ctrl+Alt+T is the shortcut to do so). Next, execute the following:
sudo add-apt-repository ppa:gnome-terminator
sudo apt-get update
sudo apt-get install terminator
Windows#
Windows users must install a terminal; you can visit Windows Apps and download the Windows Terminal directly from Microsoft (Download Windows Terminal).
Additionally, Mobaxterm, an enhanced terminal for Windows with an X11 server, tabbed SSH client, and network tools dubbed the ultimate toolbox for remote computing, is a great tool for connecting to the login node, exploring the Discovery file system, and transferring files. Check out their demo, software features, and download.
Bash Manuals#
The man command is used in the terminal to display manual pages for various tools and utilities. A manual or “man page” is detailed documentation for a specific command or utility that provides information about its usage, options, and examples.
To use the man command, simply type man followed by the command name or utility for which you want to view the manual page. For example, to view the manual page for the ls command, you would type the following:
man ls
Show manual page for ls
LS(1)                                                                           General Commands Manual                                                                          LS(1)

NAME
  ls – list directory contents

SYNOPSIS
     ls [-@ABCFGHILOPRSTUWabcdefghiklmnopqrstuvwxy1%,] [--color=when] [-D format] [file ...]

DESCRIPTION
    For each operand that names a file of a type other than directory, ls displays its name as well as any requested, associated information.  For each operand that names a file of
     type directory, ls displays the names of files contained within that directory, as well as any requested, associated information.

     If no operands are given, the contents of the current directory are displayed.  If more than one operand is given, non-directory operands are displayed first; directory and non-
     directory operands are sorted separately and in lexicographical order.


 The following options are available:

 -@      Display extended attribute keys and sizes in long (-l) output.

 -A      Include directory entries whose names begin with a dot (‘.’) except for . and ...  Automatically set for the super-user unless -I is specified.

 -B      Force printing of non-printable characters (as defined by ctype(3) and current locale settings) in file names as \xxx, where xxx is the numeric value of the character in
         octal.  This option is not defined in IEEE Std 1003.1-2008 (“POSIX.1”).

 -C      Force multi-column output; this is the default when output is to a terminal.

 -D format
         When printing in the long (-l) format, use format to format the date and time output.  The argument format is a string used by strftime(3).  Depending on the choice of
         format string, this may result in a different number of columns in the output.  This option overrides the -T option.  This option is not defined in IEEE Std 1003.1-2008
         (“POSIX.1”).

 -F      Display a slash (‘/’) immediately after each pathname that is a directory, an asterisk (‘*’) after each that is executable, an at sign (‘@’) after each symbolic link, an
         equals sign (‘=’) after each socket, a percent sign (‘%’) after each whiteout, and a vertical bar (‘|’) after each that is a FIFO.

 -G      Enable colorized output.  This option is equivalent to defining CLICOLOR or COLORTERM in the environment and setting --color=auto.  (See below.)  This functionality can
         be compiled out by removing the definition of COLORLS.  This option is not defined in IEEE Std 1003.1-2008 (“POSIX.1”).

 -H      Symbolic links on the command line are followed.  This option is assumed if none of the -F, -d, or -l options are specified.

 -I      Prevent -A from being automatically set for the super-user.  This option is not defined in IEEE Std 1003.1-2008 (“POSIX.1”).

 -L      Follow all symbolic links to final target and list the file or directory the link references rather than the link itself.  This option cancels the -P option.

 -O      Include the file flags in a long (-l) output.  This option is incompatible with IEEE Std 1003.1-2008 (“POSIX.1”).  See chflags(1) for a list of file flags and their
         meanings.

 -P      If argument is a symbolic link, list the link itself rather than the object the link references.  This option cancels the -H and -L options.

 -R      Recursively list subdirectories encountered.

 -S      Sort by size (largest file first) before sorting the operands in lexicographical order.

 -T      When printing in the long (-l) format, display complete time information for the file, including month, day, hour, minute, second, and year.  The -D option gives even
         more control over the output format.  This option is not defined in IEEE Std 1003.1-2008 (“POSIX.1”).

 -U      Use time when file was created for sorting or printing.  This option is not defined in IEEE Std 1003.1-2008 (“POSIX.1”).

 -W      Display whiteouts when scanning directories.  This option is not defined in IEEE Std 1003.1-2008 (“POSIX.1”).

 -a      Include directory entries whose names begin with a dot (‘.’).

 -b      As -B, but use C escape codes whenever possible.  This option is not defined in IEEE Std 1003.1-2008 (“POSIX.1”).

 -c      Use time when file status was last changed for sorting or printing.

 --color=when
         Output colored escape sequences based on when, which may be set to either always, auto, or never.

         always will make ls always output color.  If TERM is unset or set to an invalid terminal, then ls will fall back to explicit ANSI escape sequences without the help of
         termcap(5).  always is the default if --color is specified without an argument.

         auto will make ls output escape sequences based on termcap(5), but only if stdout is a tty and either the -G flag is specified or the COLORTERM environment variable is
         set and not empty.

         never will disable color regardless of environment variables.  never is the default when neither --color nor -G is specified.

         For compatibility with GNU coreutils, ls supports yes or force as equivalent to always, no or none as equivalent to never, and tty or if-tty as equivalent to auto.

 -d      Directories are listed as plain files (not searched recursively).

 -e      Print the Access Control List (ACL) associated with the file, if present, in long (-l) output.

 -f      Output is not sorted.  This option turns on -a.  It also negates the effect of the -r, -S and -t options.  As allowed by IEEE Std 1003.1-2008 (“POSIX.1”), this option
         has no effect on the -d, -l, -R and -s options.

 -g      This option has no effect.  It is only available for compatibility with 4.3BSD, where it was used to display the group name in the long (-l) format output.  This option
         is incompatible with IEEE Std 1003.1-2008 (“POSIX.1”).

 -h      When used with the -l option, use unit suffixes: Byte, Kilobyte, Megabyte, Gigabyte, Terabyte and Petabyte in order to reduce the number of digits to four or fewer using
         base 2 for sizes.  This option is not defined in IEEE Std 1003.1-2008 (“POSIX.1”).

 -i      For each file, print the file's file serial number (inode number).

 -k      This has the same effect as setting environment variable BLOCKSIZE to 1024, except that it also nullifies any -h options to its left.

 -l      (The lowercase letter “ell”.) List files in the long format, as described in the The Long Format subsection below.

 -m      Stream output format; list files across the page, separated by commas.

 -n      Display user and group IDs numerically rather than converting to a user or group name in a long (-l) output.  This option turns on the -l option.

 -o      List in long format, but omit the group id.

 -p      Write a slash (‘/’) after each filename if that file is a directory.

 -q      Force printing of non-graphic characters in file names as the character ‘?’; this is the default when output is to a terminal.

 -r      Reverse the order of the sort.

 -s      Display the number of blocks used in the file system by each file.  Block sizes and directory totals are handled as described in The Long Format subsection below, except
         (if the long format is not also requested) the directory totals are not output when the output is in a single column, even if multi-column output is requested.  (-l)
         format, display complete time information for the file, including month, day, hour, minute, second, and year.  The -D option gives even more control over the output
         format.  This option is not defined in IEEE Std 1003.1-2008 (“POSIX.1”).

 -t      Sort by descending time modified (most recently modified first).  If two files have the same modification timestamp, sort their names in ascending lexicographical order.
         The -r option reverses both of these sort orders.

         Note that these sort orders are contradictory: the time sequence is in descending order, the lexicographical sort is in ascending order.  This behavior is mandated by
         IEEE Std 1003.2 (“POSIX.2”).  This feature can cause problems listing files stored with sequential names on FAT file systems, such as from digital cameras, where it is
         possible to have more than one image with the same timestamp.  In such a case, the photos cannot be listed in the sequence in which they were taken.  To ensure the same
         sort order for time and for lexicographical sorting, set the environment variable LS_SAMESORT or use the -y option.  This causes ls to reverse the lexicographical sort
         order when sorting files with the same modification timestamp.

 -u      Use time of last access, instead of time of last modification of the file for sorting (-t) or long printing (-l).

 -v      Force unedited printing of non-graphic characters; this is the default when output is not to a terminal.

 -w      Force raw printing of non-printable characters.  This is the default when output is not to a terminal.  This option is not defined in IEEE Std 1003.1-2001 (“POSIX.1”).

 -x      The same as -C, except that the multi-column output is produced with entries sorted across, rather than down, the columns.

 -y      When the -t option is set, sort the alphabetical output in the same order as the time output.  This has the same effect as setting LS_SAMESORT.  See the description of
         the -t option for more details.  This option is not defined in IEEE Std 1003.1-2001 (“POSIX.1”).

 -%      Distinguish dataless files and directories with a '%' character in long

 -1      (The numeric digit “one”.) Force output to be one entry per line.  This is the default when output is not to a terminal.  (-l) output, and don't materialize dataless
         directories when listing them.

 -,      (Comma) When the -l option is set, print file sizes grouped and separated by thousands using the non-monetary separator returned by localeconv(3), typically a comma or

 -,      (Comma) When the -l option is set, print file sizes grouped and separated by thousands using the non-monetary separator returned by localeconv(3), typically a comma or
         period.  If no locale is set, or the locale does not have a non-monetary separator, this option has no effect.  This option is not defined in IEEE Std 1003.1-2001
         (“POSIX.1”).

 The -1, -C, -x, and -l options all override each other; the last one specified determines the format used.

 The -c, -u, and -U options all override each other; the last one specified determines the file time used.

 The -S and -t options override each other; the last one specified determines the sort order used.

 The -B, -b, -w, and -q options all override each other; the last one specified determines the format used for non-printable characters.

 The -H, -L and -P options all override each other (either partially or fully); they are applied in the order specified.

 By default, ls lists one entry per line to standard output; the exceptions are to terminals or when the -C or -x options are specified.xw
The manual page will be displayed in a pager program such as less, which allows you to scroll through the text and search for specific information.
The man command is a valuable tool for learning about new commands and utilities, and it is an essential resource for understanding how to use the terminal effectively. Whether you are a beginner or an advanced user, the man command provides the information you need to get the most out of your tools and utilities.
Basic Commands#
Note
See _getting_access for instructions on creating a Discovery user account.
ssh - Connect to a remote machine using Secure Shell (SSH):
ssh <user-name>@login.discovery.neu.edu
Reference: ssh(1) manual page
Note
The ~ character is shorthand for specifying the current user’s home directory, i.e., ~ is the same as $HOME.
echo - Display a message or the value of a variable.
echo "Hello, world!"
Hello, world!
Note
Variable names are accessible by appending their name to $ (e.g., ${VARIABLE_NAME}, where {} are optional but safer.)
pwd - Print the current working directory.
pwd
/path/to/directory1
Note
pwd is also stored as an environment variable, i.e., ${PWD}. Running echo ${PWD} prints the same output as pwd, but has the advantage of being accessed as part of a file pointer (e.g., ls ${PWD}/directory2 to print all contents of directory2 in the working directory.)
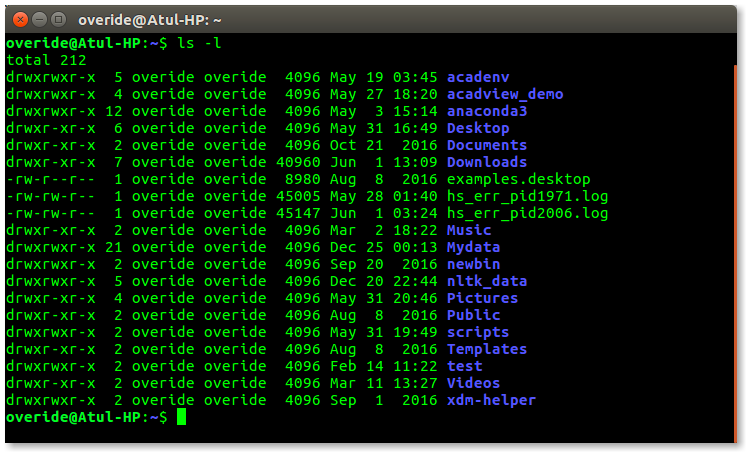
ls - List the contents of a directory.
ls
file1.txt file2.txt directory1
cd - Change the current working directory.
cd ~/directory1
pwd
<$HOME>/directory1
mkdir - Create a new directory.
 mkdir directory2
 ls
 file1.txt file2.txt directory1 directory2
rm - Remove a file or directory.
 rm file1.txt
 ls
 file2.txt directory1 directory2
Note
To remove a directory, use rmdir if the folder is empty. Otherwise, recursively delete the directory and its contents via rm -r <FOLDER_PATH>.
cp - Copy a file or directory.
 cp file2.txt file3.txt
 ls
 file2.txt file3.txt directory1 directory2
Note
Similar to removing, cp works for files; copying a folder and its contents must be done recursively via cp -r <FOLDER_PATH> <DESTINATION>.
mv - Move or rename a file or directory.
mv file2.txt file4.txt
ls
file3.txt file4.txt directory1 directory2
cat - Concatenate and display the contents of one or more files.
cat file3.txt
This is the contents of file3.txt
grep - Search for a pattern in a file or input.
grep "the" file3.txt
This is the contents of file3.txt
sort - Sort the lines of a file or input.
sort file3.txt
This is the contents of file3.txt
uniq - Remove duplicates from a sorted file or input.
sort file3.txt | uniq
This is the contents of file3.txt
wc - Count the number of lines, words, and characters in a file or input.
 wc file3.txt
 1   4  26 file3.txt
head - Display the first lines of a file or input.
 head file3.txt
 This is the contents of file3.txt
tail - Display the last lines of a file or input.
tail file3.txt
This is the contents of file3.txt
less - View the contents of a file one page at a time.
less file3.txt
top - Show the currently running processes and system information.
top
To exit, press q.
ps - Show information about the currently running processes.
ps
Note
<pid> (PID) in the command should be replaced with the actual process ID of the process you want to terminate; the output of the kill command will typically be empty unless there is an error in executing the command.
It is essential to be cautious when using the kill command, as terminating a process can cause data loss or corruption. Therefore, before using kill, you should always try to gracefully stop the process by sending a termination signal, such as SIGTERM, first. If that does not work, you can try a stronger signal, such as SIGKILL.
kill - Terminate a process by its process ID:
kill <pid>
Advanced Commands#
In this section, we will provide examples of some helpful advanced commands, and then take a closer look at three essential advanced commands.
sed - Stream editor for filtering and transforming text.
cat file1.txt
This is line 1
This is line 2
This is line 3

sed 's/line 1/Line 1/' file1.txt
This is Line 1
This is line 2
This is line 3
Reference: sed(1) manual page
gzip - Compress or decompress files.
gzip file1.txt
ls
file1.txt.gz
gunzip file1.txt.gz
ls
file1.txt
Reference: gzip(1) manual page
tar - Create or extract compressed archive files.
tar cvf archive.tar file1.txt file2.txt
ls
archive.tar file1.txt file2.txt
tar xvf archive.tar
ls
file1.txt file2.txt
Reference: tar(1) manual page
Regular expressions:
grep -E '^[A-Z][a-z]+$' file1.txt
John
Jane
Parameter expansion:
name="John Doe"
echo ${name// /_}
John_Doe
Command line options:
ls -lh
total 8.0K
drwxrwxr-x 2 user user 4.0K Feb 14 13:29 directory1
-rw-rw-r-- 1 user user   12 Feb 14 13:29 file1.txt
-rw-rw-r-- 1 user user   14 Feb 14 13:29 file2.txt
Parameter substitution:
echo ${name:4:3}
Doe
Arithmetic operations:
echo $((2 + 2))
4
File tests:
file=file1.txt
if [ -f $file ]; then
>   echo "$file is a regular file"
> fi
file1.txt is a regular file
String tests:
 string="hello"
 if [ "$string" == "hello" ]; then
 >   echo "The strings match"
 > fi
 The strings match
Command substitution with process substitution:
diff <(ls /path/to/dir1) <(ls /path/to/dir2)
The next few subsections provide more details on a few advanced bash tools that often come in handy.
rsync#
The rsync command is a powerful and versatile file transfer utility commonly used to synchronize files and directories between different locations. It can transfer files over a network connection and run in various modes, including local and remote transfers and backup operations. One of the key benefits of using rsync is its ability to transfer only the differences between the source and destination files, which can significantly reduce the amount of data transfer time required. Additionally, rsync supports various advanced features, including the ability to perform incremental backups and preserve symbolic links, making it a popular tool for system administrators and other advanced users.
Important
File transfers must be done using the transfer node on the Discovery, i.e., do not copy to or from the login node accessible via xfer.discovery.neu.edu. See Transfer Data for more information.
We have listed a few examples of rsync synchronizing files and directories between two locations, but many more options are available. Consult the rsync(1) manual page for more information on effectively using rsync.
Syncing a local directory to a remote server:
rsync -avz /local/path user@xfer.discovery.neu.edu:/remote/path
Syncing a remote server to a local directory:
rsync -avz user@xfer.discovery.neu.edu:/remote/path /local/path
Syncing a local directory to a remote server with compression:
rsync -avz --compress /local/path user@xfer.discovery.neu.edu:/remote/path
Syncing a remote server to a local directory while preserving permissions:
rsync -avz --perms user@xfer.discovery.neu.edu:/remote/path /local/path
Syncing only files that have been modified in the last hour:
rsync -avz --update --min-age=3600 /local/path user@xfer.discovery.neu.edu:/remote/path
Syncing a local directory to a remote server while excluding certain files:
rsync -avz --exclude='*.log' /local/path user@xfer.discovery.neu.edu:/remote/path
Syncing a remote server to a local directory while preserving symbolic links:
rsync -avz --links user@xfer.discovery.neu.edu:/remote/path /local/path
find#
find is a command line tool used to search for files and directories within a specified location. It starts at a specified directory and recursively searches through its subdirectories. The user can select a range of criteria to match (e.g., file name, size, modification time), and find will return a list of all files and directories that match the specified criteria. find provides a range of options for further processing the results, such as executing a command on each matching file, printing the results, or performing other operations. As a result, it is a versatile tool to search for specific files and to clean up old files.
Here are several advanced examples of using the find command to search for files and directories; see find(1) manual page for more information on how to use the command effectively.
To search for files and directories:
find /path/to/search -name "*.txt"
/path/to/search/file1.txt
/path/to/search/file2.txt
Finding files based on size
find /path/to/dir -size +10M
This will find all files in /path/to/dir that are larger than 10 MB.
Finding files based on modification time:
find /path/to/dir -mtime +7
This will find all files in /path/to/dir that have been modified more than 7 days ago.
Finding files based on type:
find /path/to/dir -type f
This will find all files in /path/to/dir that are regular files (not directories).
Finding files based on the name
find /path/to/dir -name "*.txt"
This will find all files in /path/to/dir with a .txt file extension.
Executing commands on matching files:
find /path/to/dir -name "*.txt" -exec chmod 644 {} \;
This will find all files in /path/to/dir with a .txt file extension and execute the chmod command on each file, changing its permissions to 644.
awk#
awk is a text-processing tool widely used for data extraction, report generation, and other text-related tasks. It operates by reading a file line-by-line and processing each line based on a set of rules defined by the user. The regulations specify the conditions under which certain actions are performed, such as printing specific fields, performing calculations, or modifying the text in some way. awk is particularly useful for processing tabular data, such as those found in CSV files, and extracting and manipulating data in various ways. Additionally, awk provides a rich set of string and numerical manipulation functions, making it a powerful tool for working with large data sets.
Below are a few examples of awk processing and manipulating text data, but there are many more options and features available. Consult the awk(1) manual page for more information on effectively using the tool.
We will use the sample file _resources/awk-example.sh to work through this section.
Download, or create and name a file as shown in the following block. Also, be sure to store it in the working directory.
cat awk-example.txt
John Doe 25
Jane Doe 30
Jim Smith 40
Sara Johnson 35
Michael Brown 29
This file contains a list of names and ages, with each line representing a different person and their age. The first column is the name, and the second column is the age. The columns are separated by a space.
This sample file can be used in the examples provided in the previous response to demonstrate the usage of awk command.
Print the entire contents of a file:
awk '{print}' awk-example.txt
John Doe 25
Jane Doe 30
Jim Smith 40
Sara Johnson 35
Michael Brown 29
Print specific columns from a tab-delimited file:
awk -F "\t" '{print $2}' awk-example.txt
25
30
40
35
29
Sum a column of numbers:
awk '{sum+=$2} END {print sum}' awk-example.txt
169
Print only lines that match a pattern:
awk '/Doe/ {print}' awk-example.txt
John Doe 25
Jane Doe 30
Format the output:
awk '{printf "Name: %s, Age: %d\n", $1, $2}' awk-example.txt
Name: John Doe, Age: 25
Name: Jane Doe, Age: 30
Name: Jim Smith, Age: 40
Name: Sara Johnson, Age: 35
Name: Michael Brown, Age: 29
awk '/Sara/ {print "Sara found"}' awk-example.txt
Sara found
Printing the first field of each line in a file:
awk '{print $1}' awk-example.txt
John
Jane
Jim
Sara
Michael
Printing the second field of each line in a file, only if the first field is equal to a specific value:
awk '$2 == "Doe" {print $1}' awk-example.txt
John
Jane
Printing the sum of all numbers in the third field (Age) of a file:
awk '{sum+=$3} END {print sum}' awk-example.txt
159
Printing the average of all numbers in the fourth field of a file:
awk '{sum+=$3; count++} END {print sum/count}' awk-example.txt
31.8
Printing the line number and the line text for each line in a file that contains a specific word:
awk '/Doe/ {print NR, $0}' awk-example.txt
1 John Doe 25
2 Jane Doe 30
Printing the line number and the line text for each line in a file that starts with a specific string:
awk '$1 ~ /^J/ {print NR, $0}' awk-example.txt
1 John Doe 25
2 Jane Doe 30
3 Jim Smith 40
Printing the line number, the line text, and the length of each line in a file:
awk '{print NR, $0, length($0)}' awk-example.txt
1 John Doe 25 11
2 Jane Doe 30 11
3 Jim Smith 40 12
4 Sara Johnson 35 15
5 Michael Brown 29 16
Git configurations tips and tricks#
Git is a distributed version control system for software development and other collaborative projects that allows multiple users to work on a project simultaneously while keeping track of changes and enabling easy collaboration. With Git, users can commit their changes to a local repository and push them to a remote repository so that others can access and merge their changes into the main project. Git also provides a robust set of tools for managing branches, resolving conflicts, and performing other tasks related to version control.
Git provides a range of configuration options that allow users to customize their behavior to suit their needs, including setting the username and email, specifying a preferred text editor, and setting up aliases for frequently used commands. In addition, users can either configure Git globally, which will apply the configuration to all of their Git repositories, or configure locally, which will apply the configuration only to a specific repository. This flexibility allows users to work with Git in a way that suits their workflow.
Custom Configurations#
Below you will find a few examples of Git configuration options. See Git User Manual for more information on how to customize Git to your needs.
Setting your username and email
git config --global user.name "Your Name"
git config --global user.email "[email protected]"
Setting your preferred text editor
git config --global core.editor nano
Setting your preferred diff tool
git config --global diff.tool emacs
git config --global difftool.prompt false
Setting up aliases for frequently used Git commands
git config --global alias.st status
git config --global alias.co checkout
git config --global alias.ci commit
Setting up a default push behavior:
git config --global push.default simple
Enabling colored output for Git commands:
git config --global color.ui true
Ignoring files globally across all your Git repositories as follows:
git config --global core.excludesfile ~/.gitignore_global
Enabling automatic line wrapping in Git log output as follows:
git config --global log.autoWrap true
Text Editors#
There are a few popular text editors to create, view, and modify text files from a terminal: Emacs, Vim, and Nano. Here, we briefly describe these text editors, all of which are available by default on Discovery.
Emacs#
Emacs is a popular text editor that is widely used to program, write, and read text files. You should consult the Emacs Manual or online resources for more information on how to use the text editor effectively.
To start Emacs, open a terminal and type the following command:
emacs
Once open, the following table summarizes common keyboard shortcuts (i.e., commands) for working in the text editor.
Functionality |
Command |
|---|---|
Open file |
|
Save the file |
|
Close file |
|
Cut text |
|
Paste text |
|
Undo |
|
Redo |
|
Search text |
|
Quit Emacs |
|
Moving cursor |
|
previous line |
|
next line |
|
forward character |
|
backward character |
|
For more commands, see Emacs Cheat Sheet.
Vim#
Vim is a popular text editor that is widely used for programming, writing, and other text-related tasks. Consult the VIM Manual for more information on using the text editor effectively.
Vim starts in normal mode: a mode that allows for the navigation through the text and performs various operations (e.g., search), but in read-online mode (i.e., cannot edit text).
Open a terminal and type the following command:
vim
To open an existing file, type the following command:
vim filename
Functionality |
Command |
|---|---|
Enter insert mode |
|
Enter normal mode |
|
Save the file |
|
Close file |
|
Cut text (from the front) |
|
Cut text (from the end) |
|
Paste text |
|
Undo |
|
Redo |
|
Search text |
|
Quit VIM |
|
Moving cursor |
|
Left |
|
Down |
|
Up |
|
Right |
|
GNU Nano#
Nano is a simple, easy-to-use text editor commonly used in Unix-like operating systems. Consult the GNU Nano Manual or online resources for more information on how to use the text editor effectively.
Nano can launch one of two ways from a terminal: (1) to open to an empty, unnamed file, run:
nano
To open a file by name, whether it already exists or needs to be created, run:
nano filename.txt
If the file does not exist, it will open an empty file that will persist upon saving.
Functionality |
Command |
|---|---|
Save the file |
|
Close file |
|
Cut text (from the front) |
|
Cut text (from the end) |
|
Paste text |
|
Undo |
|
Redo |
|
Search text |
|
Quit Nano |
|
Shell Scripting#
Shell scripts are a feature of Bash that allows you to automate tasks and perform complex operations. A shell script is a text file containing a series of bash commands that the shell can execute to perform a specific task.
Here is a simple example of a shell script that prints the message Hello, World! to the screen:
#!/bin/bash

echo "Hello, World!"
Notice the line #!/bin/bash at the top of a shell script (i.e., the shebang line). This line specifies which shell interpreter will be used when running the script. In this case, line #!/bin/bash specifies that the script uses the bash shell.
Note
The shebang line is the first line of the script and must start with the characters #!. The path that follows the shebang (/bin/bash in this case) specifies the location of the shell interpreter. In most cases, /bin/bash is the correct path for the bash shell.
First we must make the file executable to run this script. This is done as follows:
chmod +x hello_world.sh
Then, run the script as follows:
./hello_world.sh
This will print the message Hello, World! on the screen.
Shell scripts can do many tasks, including backups, system maintenance, and the commands covered in this tutorial. For example, you could create a script to automate the backup of your home directory by copying all of its files to a remote server. The script could include commands for compressing the files, copying them to the server, and logging the results.